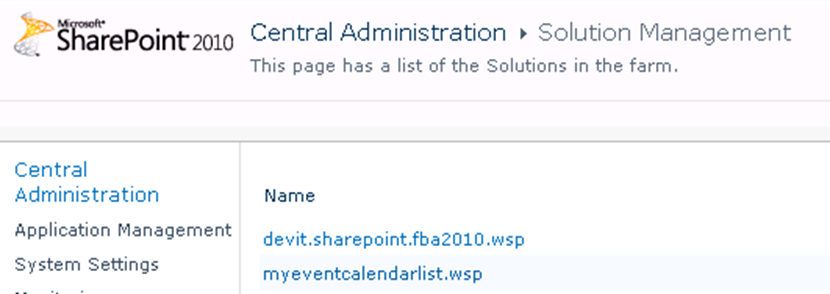
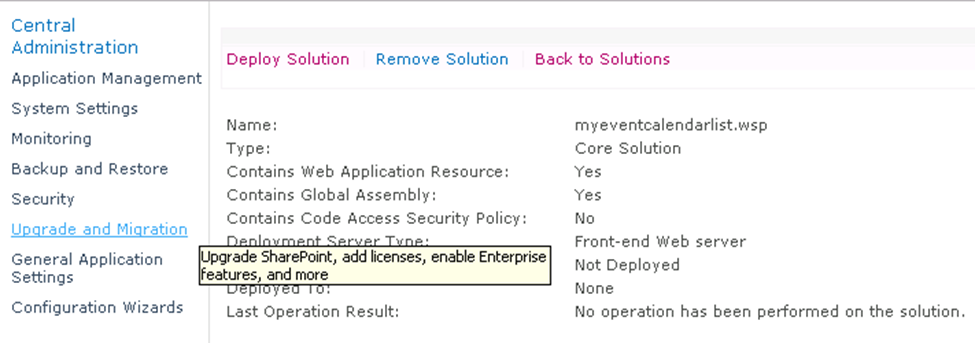
See Link
http://www.codeproject.com/Articles/31594/Creating-a-Contact-Form-Web-Part-for-SharePoint
Introduction
SharePoint is a powerful application that enables an organization to
quickly implement a web based portal for managing and sharing
information among groups of people. Out of the box, it offers many
components such as document libraries and configurable lists. For more
advanced requirements, SharePoint provides the ability to create web
parts, which are custom components that can plug into and interact with a
SharePoint site. Web parts are a simple, yet powerful way to extend the
capabilities of SharePoint to meet your organization’s unique
requirements.
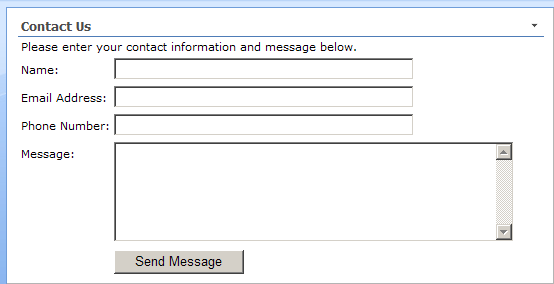
This article will show, step-by-step, how to create a simple
SharePoint web part that implements a contact form. A contact form is
typically used on a public website to provide a way for customers,
business partners, and others outside the company to submit questions or
request information by filling out fields on a web page and clicking a
Submit button. This web part will collect the user’s name, email
address, phone number, and message, and send the information to an email
address when the user clicks Submit.
Requirements
The web part created in this article will use Windows SharePoint
Services (WSS) 3.0. It will also work with MOSS 2007, which is a more
advanced version of SharePoint built on the same infrastructure as WSS
3.0. To create the web part, we will be using Visual Studio 2008
installed on Windows Server 2003, along with Windows SharePoint Services
3.0 Tools: Visual Studio 2008 Extensions, Version 1.2, which is a
free download from the Microsoft Download Center.
Creating a Web Part Project
The first step is to create a new web part project using Visual
Studio 2008. To do this, open Visual Studio 2008, and choose New –
Project from the file menu. Select Visual C# - SharePoint from the
Project Type list, and select the Web Part template from the list on the
right. Enter
ContactFormWebPart as the name and the solution
name, and choose a directory where you want the solution files to be
saved. When you click OK, an empty web part project will be created and
opened in Visual Studio.
The empty project has one web part, called
WebPart1, but this isn’t what we want to call our web part, so the first step is to delete
WebPart1 from the project by right clicking on the
WebPart1 folder in the Solution Explorer in Visual Studio and choosing Delete.
Next, let's add a new web part to the project, called
ContactForm. Right click on the
ContactFormWebPart
project in the Solution Explorer, and choose Add – New Item from the
context menu. Select SharePoint from the categories list, and Web Part
from the templates list. Enter
ContactForm for the name, and click Add.

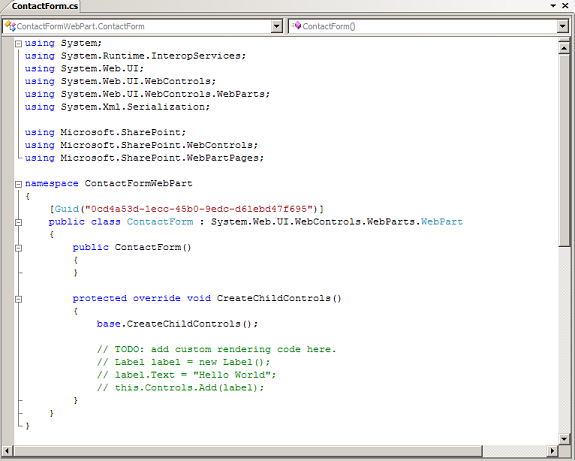
This gives you a new source file called
ContactForm.cs that has an empty class inheriting from
WebPart, with some TODO comments. In the next section, we are going to replace the
CreateChildControls() function and add some additional code to this class.
Adding Code to Create the Controls
Now, we are ready to begin writing code that will display the web part. Open
ContactForm.cs, and you will see a function called
CreateChildControls(). This function is where we will add labels, textboxes, and a button to allow the user to interact with our web part.
But first, let's create some class-level variables for the controls
that we will create. Declaring them at the class level as opposed to
within the
CreateChildControls() function will allow us to reference these controls from the button event handler later on.
 Collapse | Copy Code
TextBox txtContactName;
TextBox txtEmailAddress;
TextBox txtPhone;
TextBox txtMessage;
Button btnSendMessage;
Label lblMessageSent;
Now, let's add the code to
CreateChildControls to build
the display. In order to keep it simple, an HTML table will be used to
align the controls in a consistent manner. Each table row will have two
cells: one for the field label, and the other for the text boxes.
Controls are created one at a time and added to a table cell, which is
then added to a table row.
 Collapse | Copy Code
protected override void CreateChildControls()
{
base.CreateChildControls();
Table t;
TableRow tr;
TableCell tc;
t = new Table();
tr = new TableRow();
tc = new TableCell();
tc.ColumnSpan = 2;
tc.VerticalAlign = VerticalAlign.Top;
Label lblInstructions = new Label();
lblInstructions.Text = "Please enter your contact" +
" information and message below.";
tc.Controls.Add(lblInstructions);
tr.Controls.Add(tc);
t.Controls.Add(tr);
tr = new TableRow();
tc = new TableCell();
tc.Style["padding-top"] = "7px";
tc.VerticalAlign = VerticalAlign.Top;
Label lblContactName = new Label();
lblContactName.Text = "Name:";
tc.Controls.Add(lblContactName);
tr.Controls.Add(tc);
tc = new TableCell();
tc.VerticalAlign = VerticalAlign.Top;
txtContactName = new TextBox();
txtContactName.ID = "txtContactName";
txtContactName.Width = Unit.Pixel(300);
tc.Controls.Add(txtContactName);
tr.Controls.Add(tc);
t.Controls.Add(tr);
tr = new TableRow();
tc = new TableCell();
tc.Style["padding-top"] = "7px";
tc.VerticalAlign = VerticalAlign.Top;
Label lblEmailAddress = new Label();
lblEmailAddress.Text = "Email Address:";
tc.Controls.Add(lblEmailAddress);
tr.Controls.Add(tc);
tc = new TableCell();
tc.VerticalAlign = VerticalAlign.Top;
txtEmailAddress = new TextBox();
txtEmailAddress.ID = "txtEmailAddress";
txtEmailAddress.Width = Unit.Pixel(300);
tc.Controls.Add(txtEmailAddress);
tr.Controls.Add(tc);
t.Controls.Add(tr);
tr = new TableRow();
tc = new TableCell();
tc.Style["padding-top"] = "7px";
tc.VerticalAlign = VerticalAlign.Top;
Label lblPhone = new Label();
lblPhone.Text = "Phone Number:";
tc.Controls.Add(lblPhone);
tr.Controls.Add(tc);
tc = new TableCell();
tc.VerticalAlign = VerticalAlign.Top;
txtPhone = new TextBox();
txtPhone.ID = "txtPhone";
txtPhone.Width = Unit.Pixel(300);
tc.Controls.Add(txtPhone);
tr.Controls.Add(tc);
t.Controls.Add(tr);
tr = new TableRow();
tc = new TableCell();
tc.Style["padding-top"] = "7px";
tc.VerticalAlign = VerticalAlign.Top;
Label lblMessage = new Label();
lblMessage.Text = "Message:";
tc.Controls.Add(lblMessage);
tr.Controls.Add(tc);
tc = new TableCell();
tc.VerticalAlign = VerticalAlign.Top;
txtMessage = new TextBox();
txtMessage.ID = "txtMessage";
txtMessage.Height = Unit.Pixel(100);
txtMessage.Width = Unit.Pixel(400);
txtMessage.TextMode = TextBoxMode.MultiLine;
txtMessage.Wrap = true;
tc.Controls.Add(txtMessage);
tr.Controls.Add(tc);
t.Controls.Add(tr);
tr = new TableRow();
tc = new TableCell();
tr.Controls.Add(tc);
tc = new TableCell();
tc.VerticalAlign = VerticalAlign.Top;
lblMessageSent = new Label();
lblMessageSent.Text = "Your message has been sent. Thank you.";
lblMessageSent.Font.Bold = true;
lblMessageSent.Visible = false;
tc.Controls.Add(lblMessageSent);
tr.Controls.Add(tc);
t.Controls.Add(tr);
tr = new TableRow();
tc = new TableCell();
tr.Controls.Add(tc);
tc = new TableCell();
btnSendMessage = new Button();
btnSendMessage.Text = "Send Message";
btnSendMessage.Click += new EventHandler(btnSendMessage_Click);
tc.Controls.Add(btnSendMessage);
tr.Controls.Add(tc);
t.Controls.Add(tr);
this.Controls.Add(t);
}
Finally, we need to add an event handler to send the message as an
email when the Send Message button is clicked by the user. In the code
above, the event handler was already wired up with the line
btnSendMessage.Click += new EventHandler btnSendMessage_Click);, so now we just need to create the
btnSendMessage_Click
function. This function simply builds an email message using text that
was entered into the text boxes, and sends the email using SharePoint's
SPUtility.SendEmail() function.
You will need to change the "to" and "from" fields in the message
header for your specific situation. The "to" field specifies where the
email will be sent, and the "from" field is the email address that the
email should appear to be from. The "from" field isn't too important,
but some mail servers may require this to be a valid email address.
 Collapse | Copy Code
protected void btnSendMessage_Click(object sender, EventArgs e)
{
System.Text.StringBuilder subject = new System.Text.StringBuilder();
subject.Append("Contact Form Message from ");
subject.Append(txtContactName.Text);
System.Text.StringBuilder message = new System.Text.StringBuilder();
message.Append("Contact Name: ");
message.AppendLine(txtContactName.Text);
message.Append("Email Address: ");
message.AppendLine(txtEmailAddress.Text);
message.Append("Phone: ");
message.AppendLine(txtPhone.Text);
message.AppendLine();
message.AppendLine("Message:");
message.AppendLine(txtMessage.Text);
System.Collections.Specialized.StringDictionary messageHeader =
new System.Collections.Specialized.StringDictionary();
messageHeader.Add("to", "CustomerService@example.com");
messageHeader.Add("from", "ContactForm@example.com");
messageHeader.Add("subject", subject.ToString());
messageHeader.Add("content-type", "text/plain");
Microsoft.SharePoint.Utilities.SPUtility.SendEmail(
SPContext.Current.Web, messageHeader, message.ToString());
lblMessageSent.Visible = true;
txtContactName.Text = "";
txtEmailAddress.Text = "";
txtPhone.Text = "";
txtMessage.Text = "";
}
Testing the Web Part
Now, we are ready to test the web part. The easiest way to do this is
to choose Deploy Solution from the Build menu in Visual Studio 2008.
After it has built and deployed successfully, open a web browser and
navigate to the SharePoint website. From the Site Actions menu, choose
Edit Page. This will place the page into Edit Mode, where web parts can
be added, removed, and configured.
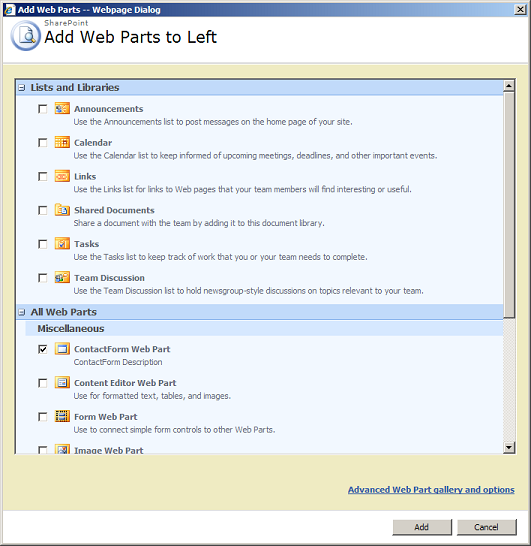
For testing purposes, we don't care about the exact placement of the
web part, so just click Add a Web Part in the main left zone. This will
open up a dialog box listing all of the web parts that are available for
use on this SharePoint server. If you scroll down the list, you should
see the
ContactForm web part. Put a checkbox next to this web part, and click the Add button.
You should now see the contact form displayed on the page. While
still in Edit Mode, you can change other settings such as the title that
is displayed above the web part, or the height and width. For testing,
we are going to leave everything as the default, so just click the Exit
Edit Mode button. The page will now show the contact form, and we are
ready to test it. Enter a name, email address, phone number, and
message, and click Send Message. If all is successful, you will see a
message saying your message has been sent, and within a few minutes,
receive the email that was generated by
btnSendMessage_Click().

Checking the Outgoing E-Mail Settings
If your receive an error message when you click Send Message, or if
the email does not arrive within 5 or 10 minutes, it could be that the
outgoing email settings have not been configured in SharePoint. This can
be done by a SharePoint administrator using the Central Administration
website. In Central Administration, go to the Operations tab, and select
Outgoing E-Mail Settings. Make sure the Outbound SMTP Server is
configured with the name of the mail server.

Deploying the Web Part
Once you have tested the web part, it is ready to be deployed as a
solution to the production SharePoint server. For this, we will create a
SharePoint solution package, which is a
.cab file that has a
.wsp extension. The
.wsp
file is created automatically when you choose Deploy from within Visual
Studio. Change the active configuration in Visual Studio from Debug to
Release, and then choose Deploy Solution from the Build menu.
After it has successfully deployed the release version to your local SharePoint server, there will be a file called
ContactFormWebPart.wsp in the
/bin/Release
subfolder of your project directory. Copy this file to a folder on your
production SharePoint web server, or to a location that can be accessed
from this server. Then, run the following commands from a command
prompt on the production SharePoint web server. These commands will add
the solution to SharePoint and then deploy the solution, making it
available for use by all sites.
 Collapse | Copy Code
C:\>stsadm -o addsolution -filename ContactFormWebPart.wsp

C:\>stsadm -o deploysolution -name ContactFormWebPart.wsp -immediate
           -allowgacdeployment -allcontenturls
Now, the web part is available for use on the production SharePoint
server. Only one more thing is left to do. When you want to use it in a
SharePoint site, you will need to add it to that site's web part
gallery. To do this, navigate to your SharePoint site and go to Site
Actions - Site Settings. Then, click on the Web Parts link under the
Galleries section. This opens up a web page listing the web parts that
are currently available for this site. Click New to add a new web part
to the list. The next web page shows the deployed web parts. Check the
box next to
ContactFormWebPart.ContactForm, and then click the Populate Gallery button.
You should now see the Contact Form Web Part in the list of web parts
in this site's gallery. Once the web part is in the gallery, you can
edit a page in the site, and add the web part to the page, just as we
did during testing.
Additional Improvements
There are some improvements that can be made to the Contact Form Web
Part that we've created, but these are beyond the scope of this article.
Here are some ideas for improving the Contact Form Web Part:
First, we could add validation to the fields to make sure that the
required fields are filled in and that the data entered matches the
expected format. For example, contact name should be required, message
should be required, the email address should match the typical format of
an email address, and the phone number should be in the format of a
valid phone number.
Second, we could add properties to the web part to allow
customization of the label text and the to and from addresses used for
sending the email. These properties would allow changes to be made to
the web part's appearance while editing the page in SharePoint, instead
of requiring those changes to be made in the source code.

